Project Matrix
Final Documentation
2016年12月4日星期日
2016年10月25日星期二
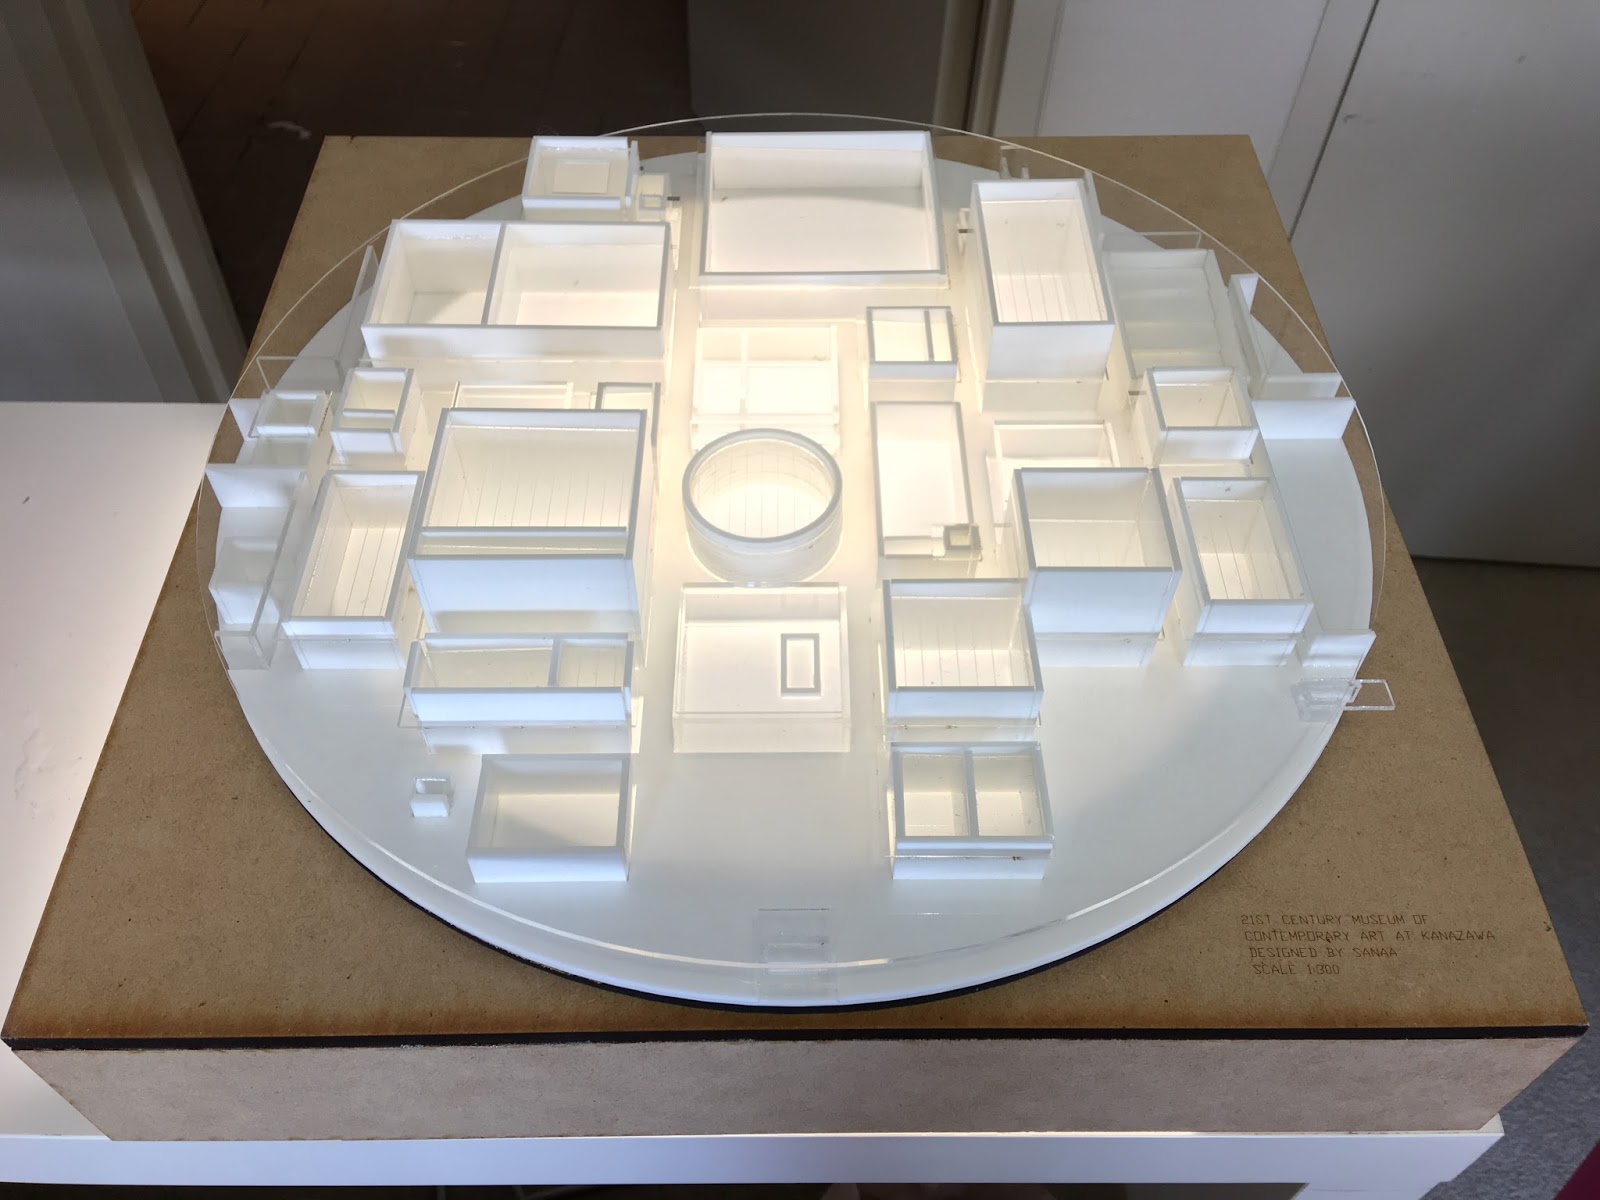
PROJECT.03 21ST CENTURY MUSEUM OF CONTEMPORARY ART AT KANAZAWA
Step 1. Model the building in sketchup.

Step 2. Extract the shapes of the walls and skylights and catagorise the components.

Step 3. Properly layout the components and import them into AI.

Step 4. Laser cutting


Step 5. Peel off the stickers on all the components one by one. (Painful procedure~)

Step 6. Assemble the walls and skylights into the base which has the shallow foot print of the rooms.

Step 7. And build the base made of MDF for lighting of the model. The model is halfway done.

Step 8. 95 percent done. Waiting for the supplementary laser cutting for the enlargement of the holes on the transparent roof. The original sizes are too small as no tolerance of the assembly has been taken into account.

Step 9. Install the roof with larger voids. Model finished and lighting effect.


PROJECT.02 TAIPEI TEK BUILDING MODEL MAKING
Step. 1 Model the building in Rhinoceros.

Step. 2 Extract the contours for the outlines for each layer. In this case 57 layers are needed for the 57mx57mx57m (LxWxH) cube, each layer of material(2mm acrylic board) stands for 1m height in reality in the scale 1:500.

Step. 3 Adding a thin edge to the layers that have been cut through in the front facade, which are actually sealed in reality.

Step. 4 Import the oulines into AI, adjust the strokes for laser cutting.

Step. 5 Laser cut the material.

Step. 6 Glue the layers according to the sequence with UHU for plastics. Here is what the 70% done model looks like.

Step. 7 Place the model on the base.

Step. 8 Model finished.

2016年10月3日星期一
PROJECT.01 PROCEDURES OF MAKING THE WAFFLE CHAIR
Step 0. Build miniature model chairs using laser cut components(to choose a more feasible model to build).


Step 1. Print out the profile of the components.


Step 2. Depict the profile on 12mm plywoods.

Step 3. Cut the components out with bandsaws of narrow and wide blade widths(for the inner curves use the jigsaw).

Step 4. Sand the edges according to the requiring shapes with disc and spindle sander.

Step 5. Further sand the rough edges and surfaces with sand paper after cutting.

Step 6. Notches testing. Use chisel and file steel to adjust the tightness.

Step 7. Apply 4 layers of coating in the spray booth.(Spray: exterior gloss varnish for timber)

Step 8. Assemble the components and adjust the notches again to make them fit in.

Step 9. Finish.


订阅:
博文 (Atom)